Identity and Access Management (AWS IAM) is one of the first services you are introduced to when learning about AWS.
IAM is Global, so no need to worry about regions, and is used to ensure users are only allowed access to the services that are required.
Everyone shouldn’t have access to everything.
AWS IAM Jargon
Users
Exactly what you think of when you think of users in the real world.
If you are setting up as AWS account for the first time you will begin with the root user and full administrative rights. Your first step should be creating a new user rather than using the root user for day to day activities.
Users can have any combination of credentials:
- AWS access key
- X.509 certificate
- SSH key
- Password for web app logins
- MFA device
Default limits:
- 5000 per account
- 50 tags per user
- 5 SSH keys per user
Groups
A collection of users. Just like in the real world this could be a group of marketing users who need access to campaign data, finance users who need more sensitive data or customer services users who need customer data.
Default limits:
- 300 per account
Roles
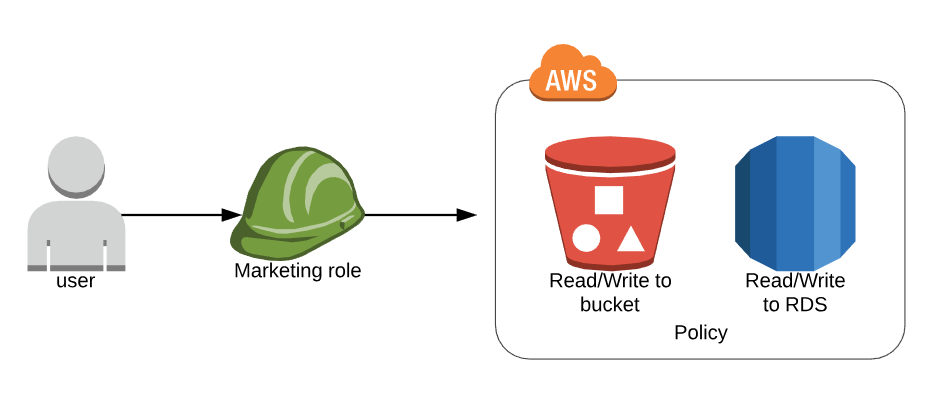
This is what defines the set of permissions your users and services have. This where you decide if the ‘marketing’ role needs to be able to read/write to an S3 bucket, read/write to the RDS, and nothing else.
Default limits:
- 1000 per account
- 50 tags per role
Policies
When they are first created users have no permissions. These are added by creating and attaching policies.
Policies come in three different forms:
Managed policies – provided by AWS and cannot be edited
Customer managed policies – created by the customer, which you can edit
Inline policies – directly attached to a user
These can be created through the AWS Console using the predefined policy documents or using JSON to define these on a case-by-case basis when you can’t get what you need through the predefined policies.
Default limit of:
- Customer-managed policies: 1500
- Policies attached to a user: 10
- Policies attached to a role: 10

Building a policy
Policies can be created either using the UI or by writing JSON with what you need.
If you choose to write, or finely tune your policy using JSON AWS has a tool that can be used to make this simpler. Even if you do not choose to use it it can be a useful way to illustrate what goes into a policy.
There are three parts to the policy at it’s most basic level:
- Version – the current version of the policy language
- Action – in this case, to create and delete buckets
- Effect – by default set to ‘Deny’ in the same way that users have no permissions by default when they are created
- Resource – used to determine the Amazon Resource Name (ARN). In this case ‘my_new_bucket’ in S3
|
1 2 3 4 5 6 7 8 9 10 11 12 13 14 15 |
{ "Version": "2012-10-17", "Statement": [ { Action": [ "s3:CreateBucket", "s3:DeleteBucket" ], "Effect": "Allow", "Resource": "arn:aws:s3:::my_new_bucket" } ] } |
Troubleshooting
- Not all services use AWS IAM so check out the restrictions
- It’s important to test that the policies are doing what you think they are. Along with the tool to build your policies, AWS offers a simulator that will test your policy will do what is expected. There is a bit of set up involved but it’s well worth it to make sure you are granting the right level of access to your users.
- The biggest challenge with AWS IAM is determining who needs access to what before you start creating policies. Take time to plan what your users are likely to need, and not need, to follow the principle of least privilege. But allow for some flexibility if privileges need to be elevated in future.
Useful links
AWS IAM Documentation
FAQ
Policy Builder
JSON Reference Guide
Testing Policies Documentation
Policy Test Simulator
Photo by sergio souza from Pexels


Comments are closed, but trackbacks and pingbacks are open.